When I have conversations around change and innovation one of the most common objections I hear is “we’ve always done it this way”.  It is one of the most dangerous phrases when it comes to business and I work hard to ensure that the businesses and individuals I deal with understand both the tangible and intangible reasons for change. Often I break up these reasons to three categories that all ultimately result in the same thing; change for the greater good. And of course, simple to adapt and adopt solutions also help with this cause. This is why we developed DocAssist as a “solution for the people” and not just for those who code their days away…

Keeping up with technology

While it’s true that “if it ain’t broke, don’t fix it”, this reductionist point of view no longer rings true with most businesses. Technology is developing rapidly and the longer businesses leave their technology upgrades, the harder it becomes to ever make that leap. If you’re business hasn’t digitalised its processes not only are you missing out on amazing new technologies such as AI and data analytics, but you are also putting your business data at risk.

A simple example of this is a personal experience I had a number of years ago. The small town I was living in at the time suffered a great flood where almost every business on the main strip was submerged for 2 days. While most of the physical damage done to the businesses was covered under insurance, a number of businesses including the local optometrist lost all of their client related data which was still maintained manually on pen and paper.

Drying patient files… The simple act of creating a digital database and storing data off-site could have easily protected the decades old patient files.

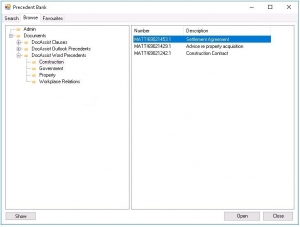
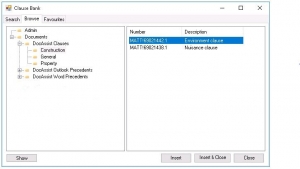
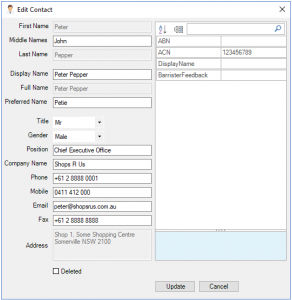
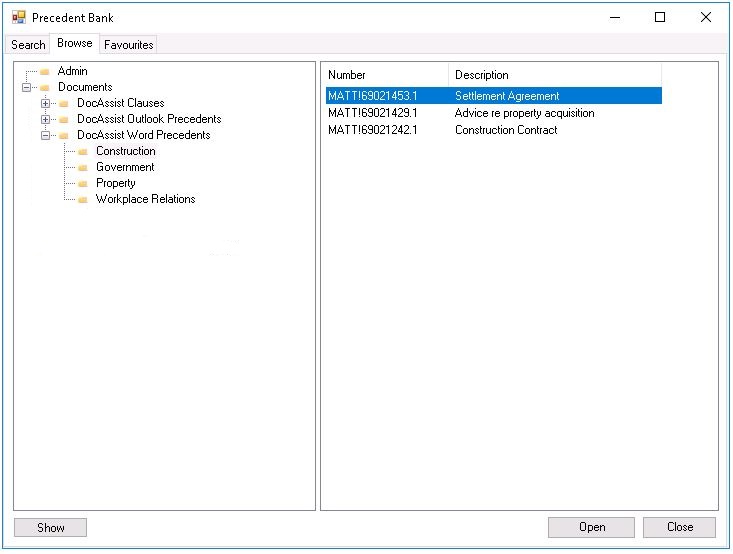
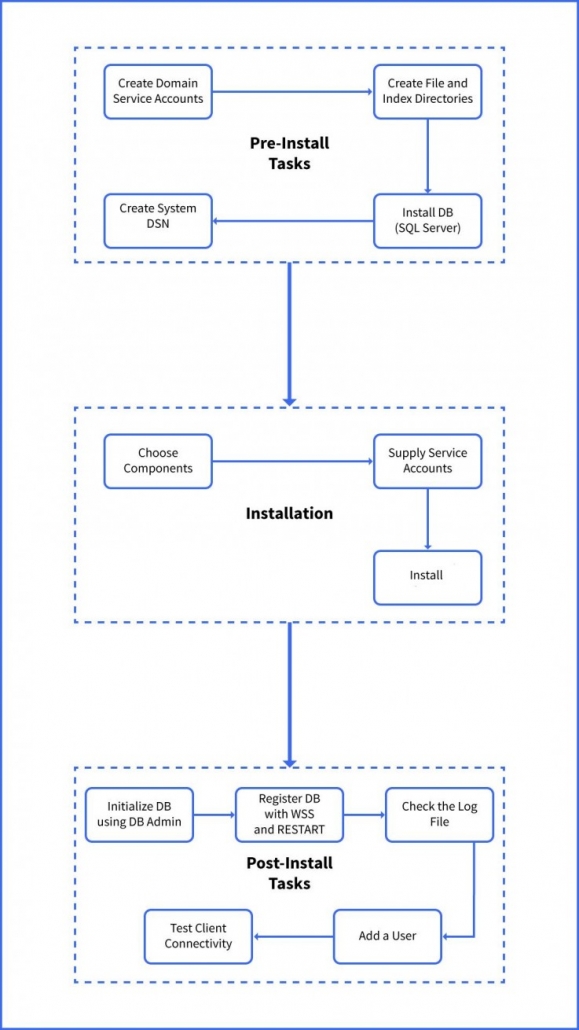
How can DocAssist Assist: DocAssist’s writeback feature can help you retain important data in its own database, so you can not only use the data again and again but you can also report on it. DocAssist also integrates seamlessly with other solutions (such as a PMS or
CRM), creating a secondary repository of contact and other client related data.

Keeping up with the changing workforce

It’s been cited in numerous research articles that the new generation of workforce value their time, space and flexible working conditions. Chaining them to a desk is not going to create a productive GenY/Z, and an unproductive workforce is not profitable. Businesses are responsible for creating an environment where their employees are able to perform their duties in physical and mental comfort.

How can DocAssist Assist: As a business tool DocAssist provides users with flexibility to change their documents and collaborate with colleagues as required. Unlike other document automation solutions you are not “stuck” with your answers, you can come back and change your options as required and see your document evolve in real time. It’s interactive nature means you won’t need to complete an entire interview
form to see the changes in your document. It all happens IRL!

For those working on the go, DocAssist also offers an off-line database, which means you can continue to access your clients, matters and contacts even if you’re not “on-site”.

Keeping up with changing customer expectations

The driver behind changing business environment is often changing client expectations. Clients are increasingly expecting to have control over their data. And like internal teams, they expect to collaborate with their lawyers when it comes to drafting documents. While digitalisation of data collection and document drafting solutions has somewhat eased this process (for both clients and lawyers), issues such as data integrity and security are still on the top of everyone’s list of concerns.

How can DocAssist Assist: In the simplest terms, a draft DocAssist document can be shared with the client in any secure means necessary for review. Because DocAssist’s main data entry and collection functionality relies on content controls, third-parties can be given some access to complete missing information on the document using only Microsoft Word. This data can even be written back to the DocAssist database once the document is received back from the client.

Additionally, data collected from client portals can also be integrated into the DocAssist database for use in the automation process.

What is your firm doing to adapt to new and emerging technologies?

New Features

  • Introduction of document data caching – meaning values of content controls are always available whether inside Select or Optional Paragraphs
  • Batch Processing tool to allow a group of DocAssist documents to be generated against a set matter and author
  • Tool to Deconstruct/Reconstruct Repeaters for ease of updating and maintaining Repeaters
  • Addressee’s email address will auto-populate into the To box when DocAssist emails are created
  • Option to retain the Outlook email signature in DocAssist emails
  • Ability to start a new precedent automatically in filtered mode – to only take the user to incomplete content controls
  • Centralised management of DocAssist licences by allocating licences to specific users, in DocAssist Admin utility
  • Centralised management of DocAssist licensing key via DocAssist Admin utility

iManage Feature Changes

  • Clause Bank dynamically updates with additions to folders and documents
  • Precedent Bank, Email Precedent Bank and Clause Bank can point to a Work10 folder in addition to a Work10 workspace

by Nissy Abraham, Developer

The previous versions of iManage up to 9.x provided us with the ability to add dll references for iManage which enabled us to customise word in VBA to use iManage functionalities. We could capture iManage events in Word VBA using the corresponding references.  But this is not the case in Work 10, where there is no possibility to get those Worksite events and properties in VBA unless through the plugins and RESTAPI’s.

The iManage Work extensibility framework enables you to create .NET plugins for iManage Work 10 for Office.  Using these plugins, you can extend and customize the functionality of the iManage Work 10 for Office add-in.

iManage Work 10 for Office plugins are .NET assemblies loaded by the iManage Work 10 for Office add-in to extend and customise its functionality.  The plugins are downloaded automatically from the Work 10 application Server for each distribution. They can catch the events when an action is performed on the application or a form is about to load, modify the document metadata, retrieve the Office document object, and so on.

Creating a Sample Plugin for Microsoft Word

Sample: Hello World

This plugin displays a “Hello World” message whenever Microsoft Word starts.

  1. Install iManage Work 10 for Office (version 10.0.1 or later).
  2. In Microsoft Visual Studio, create a new Visual C# project with unique Class Library (.NET Framework) namespace, for example,
  3. Add references to iManage Work 10 for Office libraries iwto.dll and IWInterfaces.dl. These DLLs are available in the install directory of iManage Work 10 for Office.
  4. Add a reference to System.Windows.Form under Work10OfficePlugin by right-clicking
    1. References-> Add Reference ->Assemblies ->Framework ->select System.Windows.Forms.
  5. Rename the default C# file cs to HelloWorld.cs
  6. Create a .NET class for the plugin in cs, for example, WordPlugin1. This class must derive from iManage.Work.Tools.PlugInBase

Include the following in the plugin host event in the Initialize method.

HelloWorld.cs

 using System;

using iManage.Work.Tools;

namespace Work10OfficePlugins

{

public class WordPlugin1 : PlugInBase

{

public override bool Initialize(IPlugInHost host)

{

PlugInHost = host;

PlugInId = “myId”;

host.Startup += this.onStartup;

return true;

}

private void onStartup(object sender, EventArgs args)

{

System.Windows.Forms.MessageBox.Show(“Hello World!”);

}

}

}

Sideload the plugin in the Development environment:

  1. Create a resource file by right-clicking the project txt by right-clicking the project Work10OfficePlugins-> Add -> New Item -> Text File -> Add.
  2. Specify the MAC address of the development machine. Up to 20 MAC addresses can be provided in this config file.
  3. Right-click sideload_config.txt and select ->Properties -> Build Action -> Embedded Resource

sideload_config.txt

{

data: {

“macaddresses” : [ “00-0C-29-D4-BD-92”, “C1-12-83-07-3D-4C” ]

}

}

  1. Digitally sign the assembly:
  2. Right click the project Work10OfficePlugins -> Properties -> Signing -> Sign the assembly ->. Choose a strong name key file ->  New
  3. Add a Key file name of your choice, for example, plugin
  4. Protect my key file with a password
  5. Enter a password and select OK
  6. Build the project by right-clicking the Work10OfficePlugins project and selecting Build. Ensure that there are no errors in the build.
  7. Navigate to the project directory where the compiled assembly Work10OfficePlugins.dll is.
  8. Copy Work10OfficePlugins.dll to %localappdata%/iManage/Work/plug_ins.If the plug_ins directory is not available, create it and then copy the assembly into it.
  9. Register the plugin:
  10. Add the wplugins.manifest file by right-clicking Work10OfficePlugins and selecting Add -> New Item-> Application Manifest File -> Add
  11. Add the following assembly details in the wplugins.manifest file

 wplugins.manifest

<?xml version=”1.0″ encoding=”utf-8″ ?>

<configuration>

<word>

<entrypoints>

<entrypoint class=”Work10OfficePlugins.WordPlugin1″ resource=”

Work10OfficePlugins.sideload_config.txt”>

<assemblyIdentity name=”Work10OfficePlugins” version=”1.0.0.0″

publicKeyToken=”” language=”neutral” processorArchitecture=”msil” />

<provider name=”iManage”>iManage Office Plug In #1</provider>

</entrypoint>

</entrypoints>

</word>

</configuration>

  1. Copy the file to wplugins.manifest %localappdata%/iManage/Work/plug_ins.
  2. Start Microsoft Word. The “Hello World ” message is displayed.

Deploying the plugins

In the development environment, plugins are loaded to iManage Work Server using a sideloading mechanism as shown in the above example. Sideloaded plugins are authorized to run on up to twenty computers, identified by the MAC addresses of their network cards

In the production environment, the plugins can be registered and uploaded to iManage Work Server by the administrator using REST APIs or iManage Control Center

Using iManage Control Center

iManage Control Center (iCC) enables the administrators to upload iManage Work for Office plugins to iManage Work Server.

The developer creates a zip file which contains the plugin assembly files and manifest file and sends it to the administrator. Using iCC application, the administrator defines security settings on the plugin, and uploads it to iManage Work Server.

Creating Manifest File

You need to provide the information about your Office plugin to iManage Work server in file manifest.yaml. Identify a unique ID for your plugin and create the following manifest file in the YAML format as

manifest.yaml

# Information about Office plugin

id:           UniqueIDForMyProject

name:         Sample Office plugin

publisher:    XYZ Inc.

version:      ‘1’

# Name of the extensions

desktop_extensions:

– iwtoTestPlugIn.WordPlugin

– iwtoTestPlugIn.ExcelPlugIn

– iwtoTestPlugIn.PowerPointPlugIn

– iwtoTestPlugIn.OutlookPlugI

iManage Work REST APIs

The iManage Work REST APIs enable users to perform operations such as viewing documents, browsing workspaces, and searching for documents on the iManage Work server through the HTTP protocol. Several operations that are performed through the iManage Desktop client applications can be performed and/or automated using iManage Work REST APIs.

More information regarding Work 10 upgrade is available from

https://imanage.com/support

Need Help?

Please get in touch with us should you need any help with your Work 10 upgrade.

We have years of experience with this product and know the intricate details of how to go about your upgrade.

Feature Changes

  • iManage Work10 integration
    • Save to Workspace
    • Precedent Bank
    • Email Precedent Bank
    • Clause Bank

    • Clause Bank – build on your document by inserting DocAssist clauses[/caption]
  • Certain Contact attributes can now be read only – both across standard Contact fields (ie First Name, Last Name) and extended data fields (inside the data XML)
  • Enable the removal of the Sign button from the DocAssist pane if not required at a particular site
  • Modify Gender field in Contact table to accept more than 2 characters
  • DocAssist prompt pane will now always refresh correctly to show user controls and date controls
  • Add Contact dialog updated so that users are always able to get multiple lines into the Address box
  • Enable users to action lowest level dialog without dialogs overlapping
  • Enable Edit Contact form on high DPI monitors (over 100%)
  • Renaming content controls dialog will always apply the changes
  • Improve the speed in which money controls apply calculations
  • Precedent Bank no longer forces the initial save
  • iManage profile no longer returns “0” when the Addressee of the document is blank

Our developers have been working hard lately to integrate iManage Work10 into DocAssist and it is now available in our latest release.

For all our wonderful existing clients, please get in touch for the upgrade files.  If you are new to DocAssist and would like more information, we’d love to hear from you.

Here are a few teasers of what the integration includes:

Precedent Bank – launch a new DocAssist precedent

Clause Bank – build on your document by inserting DocAssist clauses

iManage Work 10 is a modern implementation of the classic iManage solution.

The features were designed by legal professionals for legal professionals.  Work 10 introduces a platform that is native to the cloud, native to mobile devices, and includes a redesigned desktop client to offer a complete New Professional Experience between the web and the desktop.

iManage Work Server 10 is also backward-compatible, making new features available to your iManage Work classic clients without any interruption to the desktop.  Security has been enhanced and modernised with single sign-on, touch ID, and downloadable Briefcase for secure offline productivity and synchronisation.

This article outlines what to expect from your iManage Work10 upgrade as an installer. Part II of this article will discuss what you can expect as a developer.

From the Installer’s Perspective

The latest version of iManage Work Server available is 10.1.3 (10.1.3.67) and iManage Work Desktop for Windows is 10.1.3 (10.1.3.21)

iManage Work Server:

The following are the high-level instructions for installing iManage Work Server:

  1. Create a set of service user accounts and add them to a group.
  2. Create a shared directory and grant the group full access to this directory.
  3. Install Microsoft SQL Server and create the SQL database.
  4. Log in using the server service account and create an ODBC System DSN pointing to the SQL database you created in Step 3.
  5. Install iManage Work Server and start the iManage Work Services. Initialize the SQL database using DB Admin Tool, and restart iManage Work Server and the Index server

The installation process consists of three important phases:

  • Pre-installation
  • Installation
  • Post-installation

The following workflow depicts the order of these phases with the tasks that must be completed in each phase

 iManage Work Desktop

To install iManage Work Desktop for Windows client

  • Log on the system where you want to install the application using an administrator account.
  • Make sure FileSite or DeskSite, plus any other iManage Work add-ons are completely uninstalled.
  • Close all Office and Adobe applications. Double-click iManage Work Desktop for Windows.exe (this works for both x86 and x64 versions of Office).
  • Accept the License terms and conditions.
  • Click Install
  • Follow the installer prompts.

The exe ‘s and the detailed description for installation of work 10 server and client can be downloaded from iManage support site.

Need Help?

Please get in touch with us should you need any help with your Work 10 upgrade.

We have years of experience with this product and know the intricate details of how to go about your upgrade.

www.docassist.com.au

A new feature in DocAssist as of build 1094 is “Clippings”. We like to think of clippings as an easier and more versatile version of autotexts or building blocks. As you probably know, autotexts and building blocks can only be saved to templates, there’s not many options for organising them, sharing is a pain, and updating them is even more painful.

So what are Clippings. Well they are really just documents that can be inserted in to another document. Not hugely exciting until you see how they can be used.

First of all you need to configure the locations for the clippings. You can have up to 3 locations currently. We recommend Personal, just for you, Shared for your department or practise group, and Precedents for firm or company wide clippings. The locations can be on a network or local – whatever works best for you.

If you have DocAssist build 1094 or newer, you will see the configuration settings within the Settings.xml file.

Now create some clippings. In a Word document, highlight some text you want to reuse as a clipping. Then press Shift Alt S (the shortcut we usually setup – or run the SaveClipping macro) and you will get the following screen.

Save Clipping screen

Select a location to save to, and then select a folder. You can also right click to create your own folders, or rename existing ones.

Give your clipping a name, and also an optional code, and hit save.

What’s the code for…that’s the fun part. Create a new document in Word, and then type in the code and press F3 (or run the InsertClipping macro) DocAssist will find the clipping and insert it in your documents – just like an autotext/building block.

And for those clippings you don’t have a code for, or you forget the code, you can browse all of the clippings that are available just by clicking on the Clippings button on the ribbon.

Browsing for clippings

So now you have a simple way to save your own autotexts, or share them with your department or entire company or firm. You can create a standard set of codes to have them easily and quickly inserted in to documents. Plus you can create your own taxonomy for sorting your clippings.

And to top it off, you can even create shortcuts to specific folders within your clippings. So you can have options on the ribbon to say insert an execution clause, or insert an address, and it will bring up a list of all clippings from that location.

This is a very simple yet powerful feature and has received great feedback so far, so make sure you give it a go. It’s all now part of DocAssist.

Have you ever tried to open a .CHM file in Windows, and it shows the index but no content? Not exactly HELPful. It had me stumped when checking out the NetDocuments ndOffice extensibility documentation.

Well it turns out to be such a simple fix. Right click on the .CHM file, select Properties, then select Unblock.

Too easy.

We get a lot of queries about Office 365, and about whether a law firm can use the online version instead of the local applications.

It’s an interesting question, and a very interesting answer.

The first thing to be aware of is the online version of Word is very limited in what it can do. So as long as your needs for editing are basic, then the answer is “possibly”.

A deal breaker for legal is often the fact that the online version has limited support for track changes. If you have a document with track changes turned on already, then yes you can edit it online and your changes will be tracked – but the kicker is you won’t see the tracked changes online. You need to open the document on the desktop version to see your tracked changes. Also, there is no way to turn track changes on or off with the online version, so you need to do that in the desktop version of Word first.

Another commonly used feature in legal documents are cross references. Well you can forget about them in the online version.

We also won’t mention that you can’t insert or update a table of contents, you can’t add or edit styles, or you can’t add shapes, textboxes or WordArt.

There is also only limited support for content controls. The online version only supports rich text content controls – so you can forget about things like date controls and dropdowns.

Law firms tend to have a lot of addins and customisations, most of which are also not supported in the online version.  So forget about all those macros and ribbon customisations your firm uses on a daily basis  – they won’t be available. Most commercial addins are either COM or VSTO addins – which do not work online as they rely heavily on the operating system and the .Net framework so will not be happy in the confines of a browser.

Speaking of addins, that usually includes your document management system. You’ll find most will require the desktop version of Word.

The online version of the Office apps have a long way to go to even get close to the desktop versions. They may be a handy tool to get you across the line with a few basic edits especially when you’re stuck with only your phone, iPad or browser. But I don’t think you’ll be doing any of the real heavy lifting online any time soon.

Hopefully that answers the question for now.

© Copyright - DocAssist 2022